
Quick Summary
This guide provides a systematic automatic gate troubleshooting process to help property owners safely diagnose and resolve driveway gate malfunctions, from mechanical binding to electrical and sensor failures. By testing physical gate alignment and manual movement before evaluating electrical power, safety sensors, and access controls, property owners can isolate root causes while relying on Ironworks Gate Co. for complex safety and wiring repairs. After reading, you will understand how to clean and realign entrapment sensors, operate manual release mechanisms safely, and determine when to schedule a professional on-site diagnostic inspection.
Automatic Gate Troubleshooting: How to Fix Driveway Gates
When an automated driveway gate stops working, finding the root cause requires a systematic process. While electrical faults are often suspected when a gate fails to operate, mechanical binding or alignment issues can also affect operation. Understanding how mechanical parts and safety circuits interact helps ensure troubleshooting is conducted safely and effectively.
A gate that stops mid-cycle or refuses to open leaves your property insecure and can trap vehicles inside. Beyond the inconvenience, these systems operate under high torque and require careful handling. The CPSC estimated nearly 25,000 automatic gate-related injuries from 1990 through 2000, including approximately 9,000 involving children younger than 15. The CPSC identified head, neck, arm, and hand injuries among emergency-room cases reported from 1990 through 2000.[1]
Safety Warning: Always disconnect high-voltage power before opening an operator enclosure or servicing drive hardware. Keep hands clear of pinch points, chains, and hinge assemblies while testing. Never bypass entrapment sensors or other safety devices. Comprehensive troubleshooting and inspections must cover mechanical end stops, force limitation, obstacle detection, and safety-device operation, not only electrical controls. Always follow the manufacturer manual or consult a qualified technician.
Safety Standards and System Precautions
Automated gate systems must meet specific safety guidelines to reduce the risk of entrapment and structural failure. ASTM F2200 serves as the standard specification for automated vehicular gate construction. It covers horizontal slide, horizontal swing, vertical lift, vertical pivot, overhead pivot, and horizontal bifold gates. The standard outlines critical safety requirements, including positive stops to prevent over-travel, fall-over protection for sliding panels, and smooth surfaces free from dangerous protrusions.[2]
Automatic Gate Troubleshooting: Quick Diagnostic Checklist
Quick Diagnostic Summary: If your gate fails to operate, start by confirming main electrical power at the breaker and checking that safety sensors are clean and aligned according to the manufacturer manual. Disconnect the operator drive mechanism per model instructions to test manual movement. If the gate binds or catches, mechanical or structural issues must be addressed before troubleshooting electrical controls.
Top 3 Initial Checks
Before replacing electronic components, review these initial checks following manufacturer safety procedures:
- Check manual gate movement: Disengage the operator following the manufacturer instructions and move the gate manually to verify it travels smoothly across its full range without catching or dragging.
- Verify line voltage and power switches: Check your main electrical panel and dedicated disconnect switches to confirm power delivery in accordance with manufacturer electrical specifications.
- Inspect safety sensors: Ensure safety photo-eyes and entrapment protection devices are clean, unobstructed, and properly aligned. Never bypass safety devices.
What You Need Before Troubleshooting Your Electric Driveway Gate
Having appropriate tools ready helps evaluate mechanical alignment and electrical status safely. Always consult the operator manual or a qualified professional from Ironworks Gate Co. for specific testing procedures and voltage thresholds.
Recommended Tools and Supplies
- Digital multimeter: For testing electrical supply and control circuits according to manufacturer instructions.
- Level: To inspect whether posts and gate panels remain plumb and aligned.
- Operator release key or tool: Specified by the manufacturer to safely disengage the drive mechanism.
- Manufacturer-recommended lubricant: To lubricate hinges, pivot pins, and guide rollers without attracting grit.
- Microfiber cloth: For clearing dirt, spiderwebs, and debris off photo-eye optical lenses.
- Insulated hand tools: For basic maintenance tasks as directed by the equipment manual.
Step 1: Inspect Posts, Hinges, and Mechanical Components
Need automatic gate troubleshooting?
We’re available now - call for a fast, free estimate.
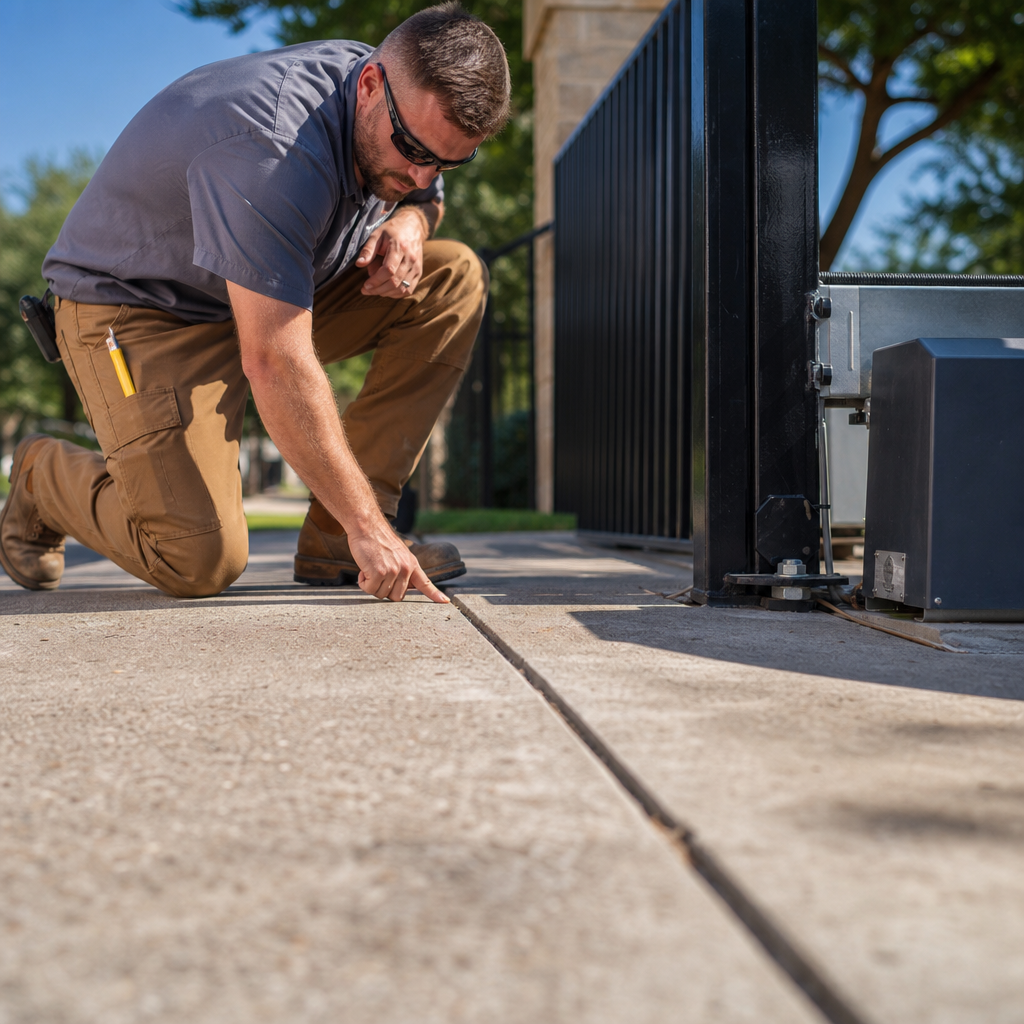
Before assessing control boards, examine support posts, hinges, and guide hardware. Structural movement or misaligned hinges can create friction that impedes gate travel.
Mechanical Strain and Force Limitation
Automated gate operators incorporate force-limitation or obstacle-detection features. When an operator encounters resistance from binding hinges or physical obstructions, the system is designed to stop or reverse. Inspections must verify that mechanical end stops and travel limits are properly positioned and functioning.
Checking Alignment
- Disengage the drive unit: Follow the manufacturer manual to safely disconnect the gate panel from the opener.
- Check post alignment: Use a level on the main hinge post to check for post lean or structural shifting.
- Test manual swing: Move the gate through its full cycle by hand to detect resistance, binding, or grinding. Adjust hardware or lubricate pivot points per manufacturer recommendations.
Step 2: Check Power Supplies and Batteries
Verify that incoming power supplies and backup battery systems conform to model-specific requirements. Refer to manufacturer documentation or consult a qualified professional when measuring voltages or servicing electrical circuits.
Testing Hardwired Power Supplies
- Inspect breaker and disconnect switches: Confirm that the dedicated breaker and any local disconnect switches feeding the operator are fully operational.
- Check operator fuses and voltage: Refer to the manufacturer documentation for model-specific voltage specifications and fuse ratings before inspecting or replacing control board fuses.
Testing Solar and Battery Backup Systems
Solar-powered and battery-backup systems require batteries capable of maintaining operating current under load. Inspect battery terminals for corrosion, and test battery conditions following the specific manufacturer guidelines and replacement criteria.
Step 3: Test and Clean Entrapment Safety Sensors
Safety Sensor Overview: Entrapment protection devices, such as photo-eyes and edge sensors, prevent gate movement or reverse travel when an obstruction is detected. Never attempt to bypass or disable these safety devices.
Inspecting Sensors and Alignment
- Check status indicators: Consult the operator manual to interpret sensor indicator lights and diagnostic status.
- Clean optical lenses: Clear dirt, cobwebs, and insect nests from sensor lenses using a soft cloth, and ensure hoods shield sensors from direct optical interference where applicable.
- Inspect sensor wiring: Check the low-voltage wires running from the sensors to the main control board for physical damage or loose terminals according to manufacturer instructions.
Step 4: Check Keypads, Remotes, and Access Controls
If the gate functions mechanically and safety sensors are clear but the system fails to respond to commands, inspect external access controls and input devices.
Troubleshooting Command Inputs
According to Ironworks Gate Co., moisture intrusion or damaged wiring in keypads, pushbuttons, and vehicle loop detectors can trigger unintended open or close signals. Inspect housings for water ingress and verify wiring connections according to the manufacturer manual.
Resolving Remote Control Issues
Check remote control batteries and verify that operator receiver antennas are undamaged, properly oriented, and positioned away from high-voltage interference as directed by the equipment guidelines.
Step 5: System Reset and Travel Limit Adjustments
Need automatic gate troubleshooting?
We’re available now - call for a fast, free estimate.
When travel settings need adjustment or an operator requires resetting, always follow the specific sequence outlined in the manufacturer manual.
Performing a System Reset
Reset procedures vary by operator model. Consult the specific manufacturer manual for the correct power-cycling steps, memory reset commands, and relearn sequences rather than applying generic reset steps.
Adjusting Open and Close Limits
Verify that open and close limit switches, physical end stops, and slowdown zones are adjusted in accordance with manufacturer specifications so the gate decelerates smoothly and stops securely within its intended path.
Step 6: Using the Manual Release Safely
During a power outage or operator malfunction, use the model-specific manual release mechanism to operate the gate manually.
| Gate Style | Standard Release Method | Securing the Open Gate |
|---|---|---|
| Swing Gates | Use the manufacturer release key or pin to uncouple the operator arm from the gate bracket. | Secure the gate panel using a cane bolt or tie-back to prevent uncontrolled movement. |
| Slide Gates | Engage the manual disconnect handle or drive release mechanism per operator instructions. | Chock the track or secure the gate panel to prevent free rolling. |
Never leave a manually disengaged gate unanchored. Strong wind gusts can slam heavy panels open or closed, causing property damage or personal injury.
Case Study: Subsystem-by-Subsystem Diagnostic Approach
Structured diagnosis requires isolating subsystems sequentially rather than assuming a single component failure. In a documented parking-gate case study, technicians used a structured subsystem-by-subsystem method to isolate an intermittent gate failure. By systematically testing mechanical components, incoming power, entrapment protection sensors, and control inputs as separate functional subsystems, technicians identified the root fault without unnecessary part replacements. This structured approach illustrates the value of evaluating physical hardware, force-limitation features, obstacle detection, and safety devices alongside electrical controls, though specific diagnostic steps will vary depending on the specific installation.[3]
Automatic Gate Repair and Maintenance Considerations
Regular preventive care helps maintain reliable operation and safety compliance. Periodically inspect and clean sliding gate tracks, lubricate pivot points in accordance with manufacturer instructions, and inspect enclosures for pest intrusion or moisture. Routine inspections must verify mechanical end stops, force limitation, obstacle detection, and safety-device operation. If repairs involve high-voltage wiring, structural modification, or complex safety controls, follow the manufacturer manual or work with a qualified technician from Ironworks Gate Co.[4]
Frequently Asked Questions About Automatic Gate Troubleshooting
Why is my gate opener motor humming but not moving?
A humming motor can indicate a failed motor capacitor, a gearbox issue, or physical binding in the gate hinges or track that prevents movement under load. Follow manufacturer safety guidelines to inspect mechanical and electrical components.
Why does my automatic gate open on its own?
Uncommanded openings typically stem from moisture inside an exterior keypad, a shorted exit loop wire, a damaged control cable, or radio frequency interference on the receiver channel.
How do I manually open an automatic gate when the power is out?
Use the designated manual release key or disconnect pin on your specific operator model to uncouple the drive arm or chain drive. Once disconnected, move the gate by hand and secure it with a cane bolt or strap so it cannot swing freely.
How do I test and realign automatic gate safety sensors?
Inspect the indicator lights on both sensor housings according to the operator manual. If an alignment fault is indicated, loosen the mounting bracket, adjust its aim toward the transmitter until the signal locks, and clean the optical lenses. Never bypass safety sensors.
How do I reset my electric driveway gate opener?
Refer to the specific operator manual for the correct reset sequence. Reset procedures, power-down requirements, and relearn routines vary by manufacturer and model.
Need automatic gate troubleshooting?
We’re available now - call for a fast, free estimate.
Sources
- [PDF] 2024-11-20-COPF-CODD-Hummingbird-Alliance-Meeting-Log.pdf – cpsc.gov (2024)
- New Safety Standard for Automatic Security Gates Helps Prevent … – cpsc.gov (2000)
- Baby gate-related injuries among children in the United … – pubmed.ncbi.nlm.nih.gov (2010)
- Standard Specification for Automated Vehicular Gate Construction – store.astm.org
Related reading: Residential Gate Entry Systems – Call Now-10% Off – Same-Day Service – Free Estimate
Related reading: Community Gate Access Control | 10% Off & Free Estimate | Same-Day Service
Related reading: Gate Access Control Systems – Call Now-10% Off – Same-Day Service – Free Estimate
Frequently Asked Questions
What should I do if my automatic gate only malfunctions during cold weather?
Cold temperatures often thicken operator gearbox grease, cause metal hinges to contract and bind, or drop battery voltage below the threshold needed to drive the motor. If cleaning debris and applying manufacturer-approved low-temperature lubricant does not restore movement, Ironworks Gate Co. can test your battery load and recalibrate system force limits.
How can I tell if my gate opener issue is a blown fuse or a damaged control board?
A blown fuse will completely cut power to the operator and can be verified using a multimeter to check for an open circuit. If a new fuse immediately blows upon insertion or if the circuit board displays scorched solder traces and unresponsive diagnostic LEDs, contact Ironworks Gate Co. to inspect for underlying voltage surges or board failure.
What are the signs that my gate malfunction is caused by post shifting or soil movement?
Common indicators include gate panels dragging across the driveway, latch pins failing to seat into their catch brackets, and excessive resistance when moving the gate manually with a level showing non-plumb posts. Because soil-related movement places severe strain on mechanical hardware and drive arms, structural realignment by a specialist like Ironworks Gate Co. is recommended to prevent motor burnout.
About the author
 |
Marcus Henderson Marcus Henderson is an access control specialist with over 10 years of experience in the automated gate industry. He previously worked as a field technician, diagnosing and repairing complex gate systems across North Texas, and now consults on residential and commercial security solutions. Marcus holds an associate degree in electronics technology from Tarrant County College. |
Gate not opening, off track, or opener dead?
We’re available now - call for a fast, free estimate.
Call Now - Free Estimate